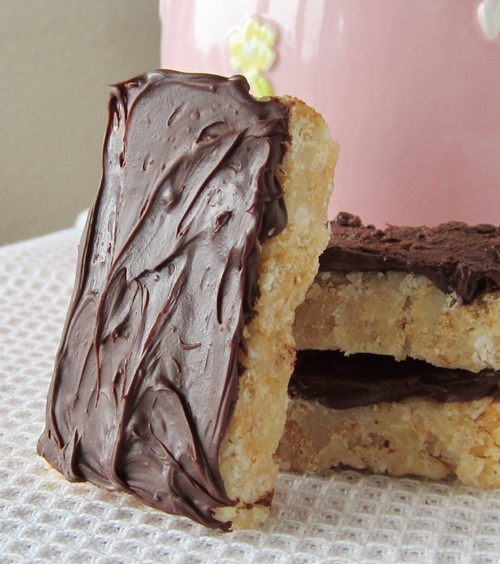
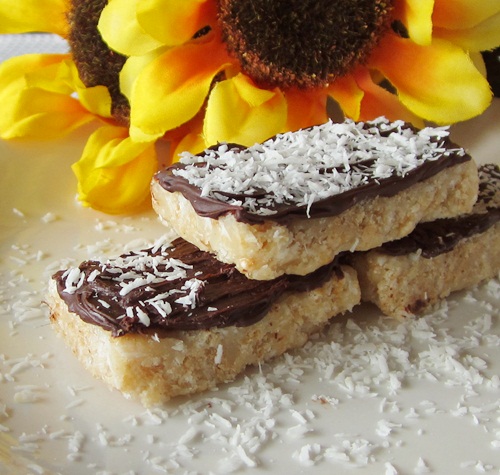
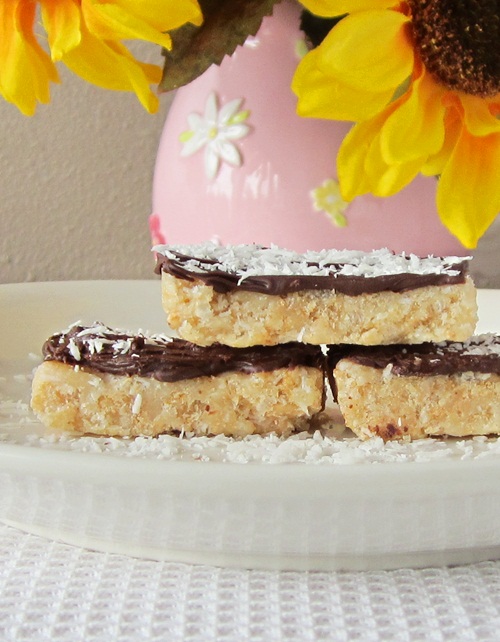
I swear that I had no intention of being such a tease! A few weeks ago, I posted a photo up on Facebook of some bars that I had just made. They were adapted from my Easter crispy treat recipe, but I had no idea how popular they would be. Since I’ve been out of town quite a bit this month, it took me a little time to get the rice crispy bars recipe and photos up for you, but it’s finally here!
Admittedly, I may be stretching the healthy claim just a wee bit, but these crispy bars are made with natural sweetener, coconut (the latest superfood, right?), gluten-free brown rice crispies, and chocolate (well-established as a superfood – that’s my story and I’m sticking to it!). Still dessert-like, but with wonderful whole food ingredients … dare I say this could be the perfect rice crispy bars recipe.

Also, most marshmallow-free crispy treats or bars are made with peanut butter or a similar nut butter. These are made purely with unsweetened shredded coconut and are a nutritious dessert or sweet snack! Here’s how the coconut works …
Coconut butter can be made in 60 seconds or less, just like nut butter, in a spice grinder or mini-food processor. For this rice crispy bars recipe, I place most of the shredded coconut (I use this brand) into my handy-dandy personal-sized blender ($20 on sale at JCP! Mine is Cooks brand, but it’s identical to this Bella Cucina personal blender sold elsewhere), slap on the grinder blade, and whiz away. It works like a dream. If you prefer, you can use store bought coconut butter for convenience. However, I would melt it a little before adding the other ingredients as it can solidify quite a bit if stored in cooler temperatures.
Important: Since this recipe makes a relatively small amount of coconut butter, I do not recommend using a large food processor! This is meant to be a simple recipe for everyone. The coconut needs to be completely ground so that you are left with a paste and oil. In a large food processor, it will likely spin into a ball and will not be processed enough. Stick with the little stuff!
If you aren’t a big coconut fan, but still want to give this rice crispy bars recipe a go, you can skip the additional 1/4 cup of shredded coconut and the extra coconut sprinkled on top. That way you still get the buttery goodness of the coconut, but without the coconut-texture.

Either way, I highly recommend this gluten-free and dairy-free rice crispy bars recipe. The coconut is still rich, but has a lighter flavor than nut or seed butters, giving ordinary crispy treats a fresh spring-like vibe.

- 1-1/2 Cups + ¼ Cup Shredded Unsweetened Coconut, plus additional for sprinkling if desired (about 2 Tablespoons)
- 6 Tablespoons (1/4 cup + 2 tablespoons) Honey or Agave Nectar
- ½ Teaspoon Vanilla Extract
- 2 Cups Gluten-Free Crispy Brown Rice Cereal
- ½ to ¾ Cup Dairy-Free Chocolate Chips
- Lightly grease an 8 x 8 baking pan (I use glass)
- Place the 1-1/2 cups of coconut in a small food processor or spice grinder (see my notes above), and whiz until it clumps and turns into a paste with a fair bit of residual oil (about 1 to 3 minutes). DO NOT stop short. This must be butter and oil!
- Place the coconut paste/oil in a small saucepan, add the honey and vanilla, whisking over medium-low heat (do not be tempted to turn the heat up!) until it is smooth, and all of the residual oil is incorporated (about 3 to 5 minutes). The mixture will be thick and sticky (kind of like melted marshmallows), but smooth and spreadable.
- Remove from the heat, stir in the crispy rice cereal and the remaining ¼ cup of shredded coconut. It will be thick, like rice crispy treats, but should combine with gentle stirring.
- Press the crispy mix evenly into the baking pan. If needed, you can use plastic wrap or parchment paper between your hands and the mix as you press it in to avoid sticking.
- Chill the treats in the freezer for 10 to 15 minutes (no longer).
- While those are chilling, melt ½ cup of the chocolate chips in a bowl (I microwave them on high for 1 minute, and then stir vigorously until smooth). You might need more depending on how zealous you get with the dipping.
- Cut the crispies into squares or bars, big or small. Whatever shape you desire! I usually do 8 longer bars, or 12 smaller treats.
- Dip the bars/treats in the chocolate, then turn them chocolate side up and place them on a plate while the chocolate dries.
- If desired, sprinkle the treats with coconut while the chocolate is still wet.
- I like to store these in the refrigerator or freezer to keep them crisp, but they will keep at room temperature, too. Just don’t expect them to last too long … these get eaten quickly in my house!

29 Comments
This was really good! We tried this, veganized, and it turned out great! We did have to make a few changes but that was because we have a weak food processor that would not get the coconut creamed. I wrote about my experience and shared with my viewers with a link to your recipe, hopefully you don’t mind. Thanks again. 🙂
So glad you enjoyed! Your link-ups are welcome 🙂
Hi! I was so excited to make these for the 4th!! They look so good and a better option 🙂 but I got home and realized I don’t have coconut butter and I don’t believe I have enough shredded coconut to make any… My question is.. Is there anything I can us instead of the coconut butter?? Thanks!!
Do you have coconut oil Julie? You could try half coconut oil, half nut butter. a little different, but I’m thinking they would work – though be a little more melty!
Pingback: Put A Coconut On It! Cooking with Coconut
Pingback: 2014-03-21 Fabulous Friday Finds | surviving the food allergy apocalypse
Hello, can’t wait to try these. I just got back from the store and realized that I bought sweetened coconut flakes. Will this be a problem?
Hi Allison, I haven’t tested them with the sweetened. They will need to turn into a thick paste upon grinding and will make the bars much sweeter.
Hi Alisa, What kind of food processor do you have? I could have (and nearly did) whiz all day and I do not believe I would have butter and oil from the coconut!
Thanks
Hi Kimberly, I don’t use a food processor – just a grinder. Small works best for small batches like this. I usually get coconut butter within 2 to 3 minutes. I use the spice grinder attachment on a personal size blender (about $20 to $30 for the personal blender with attachments at most stores). If using a large food processor, you need to do a much larger batch.
Thanks! I tried to find butterscotch chips, but they all have a bunch of garbage in it, so will have to stick to choc chips. I will use my cuisinart to blent that coconut. Hopefully it turns into the pasty butter like it does for you! I bought the Bob’s RedMill Unsweetened coconut flakes. http://www.bobsredmill.com/coconut-flakes.html – hope it works!
Hi – I was going to test these out with a Valentine shape mold after setting in the freezer. I wanted to do the chocolate/butterscotch topping (like in the http://www.ricekrispies.com/en_US/recipes/chocolate-scotcheroos.html – BUT obviously the healthier version above). However, do you think I can dip these into the choc/BS mixture and let dry? The RK version has you spread across the top and let stand until firm. I’ve had the RK version in the past and the choc/butterscotch is a pretty thick coat, but I like the taste of the two chocolates combined. And I think with this topping, storing at room temp is best as the chocolate/BS will get too hard in the fridge – correct?
Look forward to trying this recipe! I’ve been looking for an alternative to marshmallows and many are with peanut butter, etc – which I’ve heard does not stick the same way. We use coconut oil and coconut based ingredients for many things and love the way they work! I haven’t tried the shredded coconut to make a paste (we’ve used coconut oil and it sounds like this is different), so will be fun to try it out!
Also, to Michelle above – you can use http://www.myfitnesspal.com/ to calculate ingredients for calories.
Hi Ange,
I’m not sure, but why not give it a try?! It sounds like it would work and yum – I love butterscotch! When making your own coconut butter, be sure to follow my full instructions – keep on blending until it really is a butter – a little patience is involved. And heat so that it doesn’t solidify in the cooler temps before adding the crispies. Enjoy!
These look delicious! I will have to try them! Could you tell me what the calorie count is per bar?
Hi Michelle, I don’t have the calorie count, but you can calculate it using sites like nutrition data.
whizzed my shredded coconut but it didn’t clump at all =(
Keep whizzing 🙂 It takes a minute or two for the oils to release. It is pretty much the same process as making nut butter. I just use a spice grinder, and it comes together within a couple of minutes – just made it last night!
Followed this recipe exactly and left the bars in the freezer twice as long and they just fell apart!!
Hi Madison, you have to take the bars out after 15 minutes – you can’t leave them in longer before cutting. Coconut butter sets up like coconut oil and will cause them to break and crumble if you let them set up too firm. I will test the recipe again just to be sure, but it is one we have made often without issue.
Madison, I just tested the recipe again, as written, and had no problems at all. They were cohesive yet chewy – similar to rice crispy treats made with marshmallows. I will clarify in the directions on the melting process. Be sure not to freeze them longer than 15 minutes as noted, otherwise they may be too solid and could crumble when cutting.
I tried these and had no luck incorporating the rice into the coconut butter/honey mixture. The mixture was like play doh and did not blend with the rice at all. I ended up putting the lot back into the blender to get the rice to stick together. What did I do wrong?
Hi Leslie, odd – I’ve made these many times and never had that problem. Did you use premade coconut butter, or were you grinding fresh? If grinding fresh, make sure you get to the “butter” stage where it is a bit oily. Also, the oily part of coconut butter will tend to solidify at cooler room temperatures. Make sure it is kept warm and isn’t setting up too quickly on you.
Wow, thanks for the response!!! Haha, I’m new to this gf df sf business. 🙂
Help! I’m making these for a funeral where the grandkids have gluten, soy, dairy allergy. I just got home from the whole foods store with all the ingredients. I was going to grease my pan, but crisco and spray have soy/soy lecithin. Do you know if coconut oil would work? I also have peanut oil. I traveled a ways with my infant to get the stuff, and am running low on energy. Thanks!
Hi Melissa, don’t use the coconut oil for greasing! You are chilling the bars, and coconut oil solidifies when chilled. If you grease with it, the bars will cement to the pan! You can grease with peanut, canola, grapeseed, or vegetable oil without a problem, or line the pan with parchment paper and left the bars out to cut. Best wishes.
Ok, so I just re-read the recipe. I realized that these are a no bake confection, so I bet coconut oil would work. I just need something to keep the bars from sticking to the pan and i dont need to worry about heat safe oil. Lol!
Pingback: Sweet Treat to Try! | The Wheat Free Family
If I use store bought coconut butter, how much do I use?
Tiffany, by my measurements, a scant 1/2 cup of coconut butter (around 7 tablespoons) should work for the 1-1/2 cups of coconut, so long as the coconut butter is made from all coconut meat (no coconut oil added). If coconut oil is added, then you would need to use less to prevent it from being to oily.