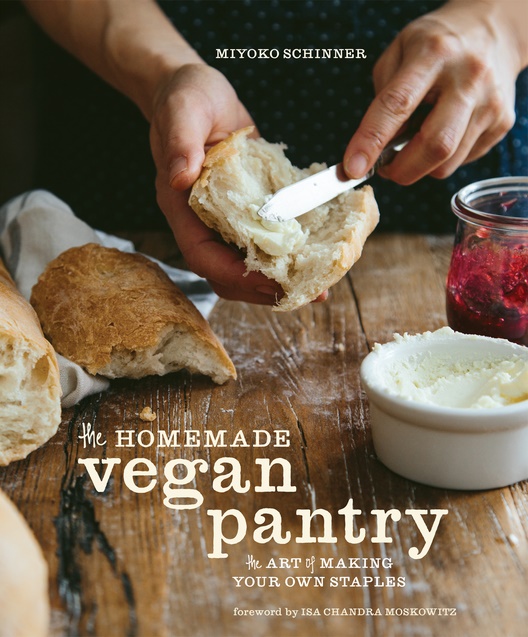
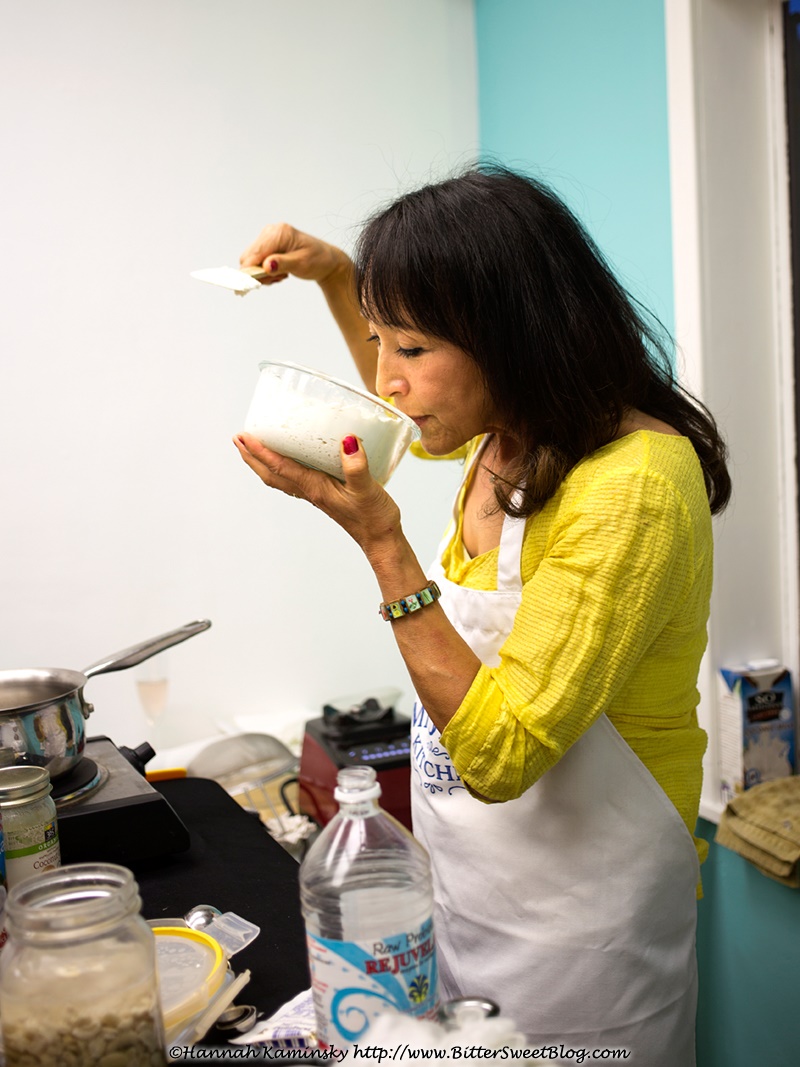
A few weeks ago, I told you about an event held by VegNews with the amazing Miyoko Schinner present. She dazzled us with her singing, witty stories, and of course, her recipes. One that she whipped up was a versatile, spot on dairy-free almond feta from her new cookbook (launching today!), The Homemade Vegan Pantry: The Art of Making Your Own Staples. And yes, we are sharing that amazing mock cheese recipe today …
But first, I’d be remiss not to offer some information about this fantastic new essential. While I expected a big intro discussing ingredients, shopping and techniques, Miyoko opted not to mess around. The Homemade Vegan Pantry begins with just a brief “hello” introduction and then jumps right into the recipes.
And though every morsel is dairy-free, The Homemade Vegan Pantry is really a DIY dream for vegans with chapters for Condiments, Dairy and Egg-Free Goodness, All You Need Is Soup, The Meat of the Argument, Magic and Pasta, The Grains of Truth, and Sweet Endings. For a quick taste of the variety, here is a recipe sampling of two titles from each chapter:
 Classic eggless mayo
- Erster (oyster) sauce
- Glorious butterless butter
- Flaxseed meringue
- Got no beef broth
- See-food chowder
- Canadian yuba “bacon”
- Italian unsausages
- 15-minute rustic pasta
- Well-crafted macaroni and cheese mix
- Buckwheat pancake and waffle mix
- Basic yeasted sweet pastry dough
- Homemade vanilla extract
- Custard
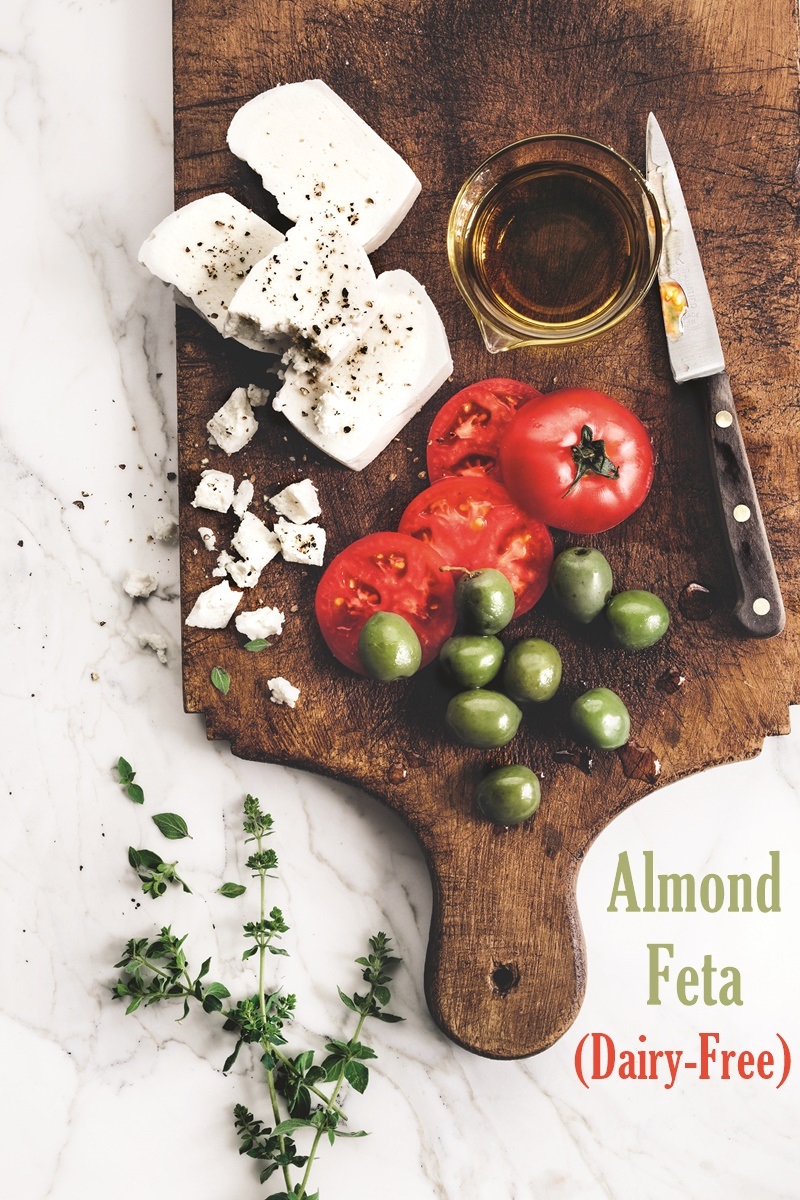
Naturally, there is a good smattering of vegan “cheese” recipes in The Homemade Vegan Pantry, too, because that’s how Miyoko rolls. And this dairy-free almond feta seemed to be one that she was particularly proud of.
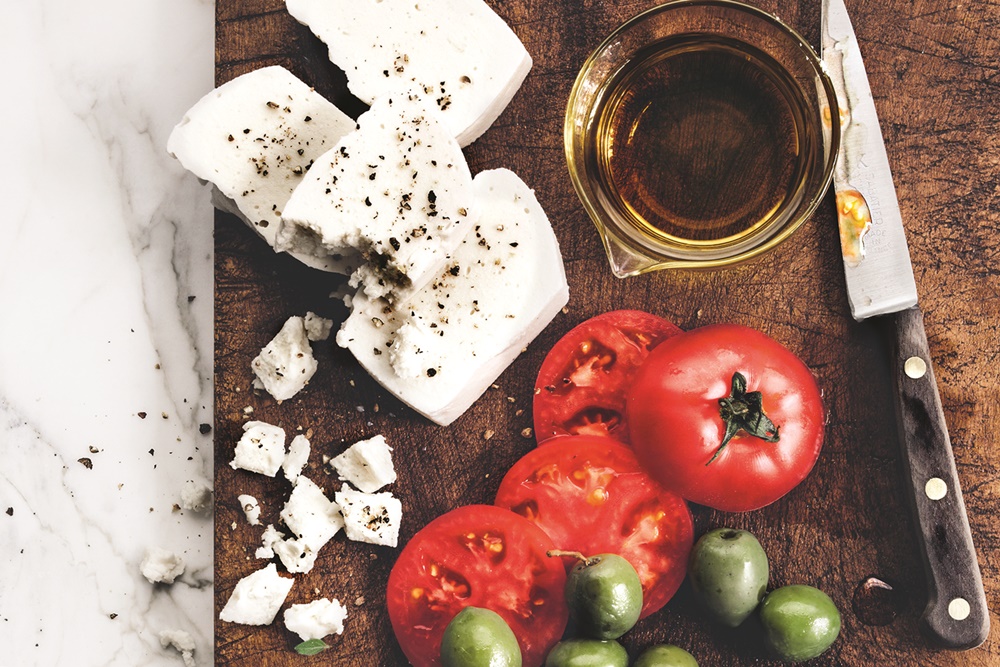
I had almost forgotten the joy that feta cheese can add to dishes. For example, the wonderful Greek spinach pie, spanakopita – I had basically given up on this entirely. I’d made and had many vegan versions of it, but without the briny flavor of feta, the flavors just fell flat. After much knocking around in my noggin, I came up with the perfect vegan substitute. Salty and briny, this dairy-free almond feta works beautifully crumbled over salads or slightly melted in all of the traditional dishes. Best of all, stored in brine, it keeps for weeks, getting stronger in flavor and more delicious as time goes by (in fact, it vastly improves after a month, so make this weeks ahead of time if you can).
Though I had to pass on the spanakopita at the event (I was simply too full!), the feedback from others was “delicious”, “just like the real thing”, and “can I have another?”. I did get the chance to sample the dairy-free almond feta “cheese” on Greek salad, and indeed, it tasted every bit as impressive and perfect as it looks.
Reader Raves for this Dairy-Free Almond Feta
Thanks to Val for sharing her feedback for this recipe on Facebook:
This is so easy and so good – I am in awe! I don’t know how I am going to actually age it a few weeks…I am loving it just the way it is right now! I put some on salad for lunch, and just had some spread on gf bread for dinner. Next time might have to make a double batch so that I can hide some and let it age! Thank you!

Special Diet Notes: Dairy-Free Almond Feta Cheese
By ingredients, this recipe is dairy-free / non-dairy, egg-free, gluten-free, peanut-free, soy-free, vegan / plant-based, and vegetarian.
- 2 cups blanched almonds, soaked in water for 12 to 24 hours
- 1 cup Easy Rejuvelac (recipe below or store-bought) or juice from sauerkraut
- ½ teaspoon sea salt
- ⅔ cup water
- 2 tablespoons agar powder
- 6 cups water
- ¾ cup sea salt or kosher salt
- For the almond feta, drain and rinse the almonds. Place them in your blender with the rejuvelac and salt, and process on the highest setting for 1 to 2 minutes until smooth and no longer grainy to the tongue.
- Pour the mixture into a clean container and cover with a nonpermeable lid or plastic wrap.
- Leave on your kitchen counter for 1 to 2 days to culture, making sure you taste it each day, until it begins to get tangy. Keep in mind there is no hard and fast rule about how long it needs to culture—your taste buds will have to guide you in determining the right length of time. In warmer weather, it could be just a day, while in cooler weather, it could take 2 days or even longer.
- Once the cheese is slightly tangy, you can move onto solidifying it. First, prepare the mold for the cheese by lining an 8-inch square pan with cheesecloth.
- Combine the water and agar in a medium saucepan and whisk well. Cover the pan with a lid and bring to a simmer over low heat. Don’t peek for 3 to 4 minutes, then check to see if it is bubbling away. At first, if you peek too early, it may look as if it has solidified. However, if you let it simmer over low heat for a couple of minutes more, it will start to liquefy again and bubble away. When the agar is fully dissolved, pour in the cultured almond mixture and whisk immediately until fully combined.
- Pour the cheese mixture into the cheesecloth-lined pan. Refrigerate for several hours, until hard.
- Prepare the brine by whisking together the water and the salt in a large bowl until most of the salt is dissolved. Cut the cheese into four pieces and place in the brine. Cover and let sit for 8 hours at room temperature.
- Transfer the cheese to a storage container and pour the brine over the cheese until it is halfway submerged. Add more plain water to completely cover the cheese and dilute the brine. Store in the refrigerator for up to 3 or 4 months. The flavor vastly improves after the first 3 to 4 weeks.
- 1 cup whole grains (such as brown rice, Kamut berries, millet, oat groats, quinoa, rye berries, wheat berries, or a combination)
- 6 cups filtered water
- Put the grains in a 1-quart glass jar and add water to cover. Place a double layer of cheesecloth over the mouth of the jar and secure it with a rubber band. Let the grains soak for 8 to 12 hours.
- Drain, then add just enough water to moisten the grains but not so much that they are immersed in water. Put the jar in a warm place out of direct sunlight for 1 to 3 days and rinse the grains once or twice a day, each time draining well and then adding just enough fresh water to moisten them.
- Continue this process until the grains have begun to sprout (they will have little tails emerging).
- Divide the sprouted grains equally between two 1-quart glass jars. Pour 3 cups of the filtered water into each jar. Cover each jar with fresh cheesecloth and secure it with rubber bands. Put the jars in a warm place out of direct sunlight for 1 to 3 days. The water will turn cloudy and white, and the liquid will have a slightly tart flavor, somewhat like lemon juice.
- Strain the liquid into clean glass jars and discard the grains.
67 Comments
I too had a problem with it getting firm. Does the cheese go into the agar or the agar into the cheese and does that matter? I dissolved the agar powder and heated it then added it to the cheese. Wish I knew what went wrong. Any ideas?
Hi Diane, I’m so sorry, but I’m not quite sure what you are asking. Once the agar is prepared, you stir the almond mixture into it. With that amount of agar in the cheese alternative, it should definitely set up!
Hi! I have ground almonds do you know which amount I need to use? (Or weight of 2 cups almond so it is equivalent) thank you
Based on the online calculators, it looks like about 300 grams. But your result will be affected since you won’t be able to soak and drain the almonds. It will have less water absorbed.
I took all the steps in the recipe, when on step 5, (Don’t peek for 3 to 4 minutes, then check to see if it is bubbling away. At first, if you peek too early, it may look as if it has solidified. However, if you let it simmer over low heat for a couple of minutes more, it will start to liquefy again and bubble away. ) not true at all! It did not dissolve. Anyway it went even worst when I added the brine, the cheese started melting away, so I had to throw the brine.
Hi Lu, I’m so sorry Miyoko’s recipe didn’t work out for you. I can’t comment on Miyoko’s recipe specifically, but have used agar myself in the past, and it dissolved with little fuss at all. This sounds like it might be an issue with the agar itself.
I had the same exact problem. Have you tried again?
Thanks for sharing the recipe, it turned out great!
This was an epic fail for me. The cheese didn’t harden at all. Stayed the consistency of hummus. Tasty as a cracker spread, but really, a big waste of time. Yes, I used powder, not flakes.
Hi Joanne, I’m so sorry for your frustration, and wish this was my own recipe, so I could help you troubleshoot more easily. I can say that it sounds like your agar didn’t “activate” I just can’t say why. I’ve used it to make cheese alternatives, and it sets up quite firmly without much trouble. And this recipe uses quite a bit of it. The spread consistency implies that you’re only getting the thickening power of the almonds, but none from the agar.
Hy! You guys are wonderfull! Thank you for everything!
I have a little question, my “cheese is in the fridge but it seems it wont get that hard it’s semi hard, can I countinue with the recipe or it will get softer ? thank you!
It is “feta” so it should only be semi-hard. It doesn’t soften much in the brine.
Hi Robin, this is Miyoko’s recipe, and she’s gotten a bit too busy with her vegan cheese business to check in here, but I’ll do my best to help! I did watch Miyoko make this recipe in a demonstration. It was a while ago, but I remember that she had to whisk for quite a while to get the mixture smooth. When I work with agar I use my blender. I would personally put the almond mixture in the blender, add the dissolved agar, and immediately blend. This works well in the cheese alternative recipes that I use agar in, and might be the solution for this recipe.
Same here, Robin, except I’ve haven’t been successful yet. This is the third time I am putting the cheese back in the blender and adding even MORE agar mixture AGAIN. Still comes out the consistency of hummus. And yes, I am using POWDER, not flakes. Very frustrating. The only thing keeping me from being really mad about this is that it still makes a tasty spread. But that’s not what I expected. A video would be helpful.
I have read all the instructions and been successful only twice. I’m obviously doing something wrong with the agar but I can’t work out what. Usually, the feta doesn’t set properly and dissolves in the brine. Then I have to drain it in muslin and just use it like cream cheese. Other times, the agar goes into little pieces in the almond mixture. Can you please make a video of the agar making process and adding it to the almonds or explain in more detail what it should look like and how to blend the hot agar into the cold almond mixture?
I am thrilled with this recipe especially taste and texture when it works but still struggling a bit with the agar. The first time I whisked the nuts in, I got small chunks of agar in the “cheese” and there was quite a layer of set agar left on the bottom of the saucepan so the cheese probably wasn’t as firm as it could have been. A friend suggested keeping it over warm water or a warm element and that worked. I’ve just made it again and had the same problem of chunks and setting before it’s blended into the cheese. Any bright ideas?
Hi Robin, did you keep it warm the whole time? I saw Miyoko do a demo of this recipe, and she did keep it warm.
Can you substitute cashews for the almonds?
Probably, but cashews tend to yield creamier results.
My Rejuvelac smells a little “off”. Is that normal? I used tricolored quinoa. TIA!
=^••^=
I’m no rejuvelac expert Lori, so I’m not sure! This post covers the smell pretty well and might help -> http://www.marystestkitchen.com/make-rejuvelac-culturing-cheese/
If substituting probiotic powder for rejuvelac, will any do? For example to capsules people take as supplements for digestive health?
? thanks
You will want to break open the capsule and measure the powder. I have read that you can substitute rejuvelac with 1 cup purified water + 1/8 teaspoon of dairy-free probiotic powder per cup of Rejuvelac. I can’t tell you for sure that this will be ideal – I haven’t tested this recipe that way myself – but in theory, a good brand with a high live and active culture count should work.
I had trouble with the agar step. After 4 minutes, it still looked solid so I wisked the agar and then added the cultured cheese.Once I poured the mixture into the cheese cloth lined pan , I saw small lumps of the agar in the cultured cheese. Im going to go ahead with the next few steps to get an idea of taste. I’m sure texture will be off. I have worked with agar before, but always wisked the whole time it was simmering. Any ideas where I went wrong? I love Miyoko’s cheese, but my closest source is 45 miles away.
Hi Fran, you want to keep simmering until the agar isn’t solid anymore. I actually watched Miyoko make this recipe on her book launch, and she is more of an artist in her style. I would take her minutes estimations loosely, and go by what it looks like instead. Does that make sense? That said, if you are more confident in your technique of whisking as it simmers, then go with that. That is what I do, too. And really, you are just looking to dissolve it, so whatever way works for you.
I have a vitamix 6300, but I can not get the almonds to blend into a creamy texture. I used 2 cups of soaked almonds (48 hours), 1 cup of saurkraut juice and 1/2 tsp salt. I’ve had to add a lot of water and it still won’t blend. Any suggestions?
So are you saying that your mixture is too thick to blend or that you are getting nut bits left behind?
Pingback: Quinoa Spinach Salad - Go Dairy Free
Hi ,
I have a question for step 6. , it says to refrigerate the cheese for several hours until it becomes hard.
Are we supposed to cover it at all? If so, what should one use? Plastic wrap or cheese cloth?
You can cover the pan. I would just to keep it fresh, but you don’t need to wrap the cheese specifically.