Once a month we’re featuring a new family-friendly dish for our Kids Can Cook section from the Hatfields. The dairy-free teen cooking star is Katherine and this week she is sharing her favorite recipe for homemade rolls. Her mom, Sarah, has the pictures and details for us …
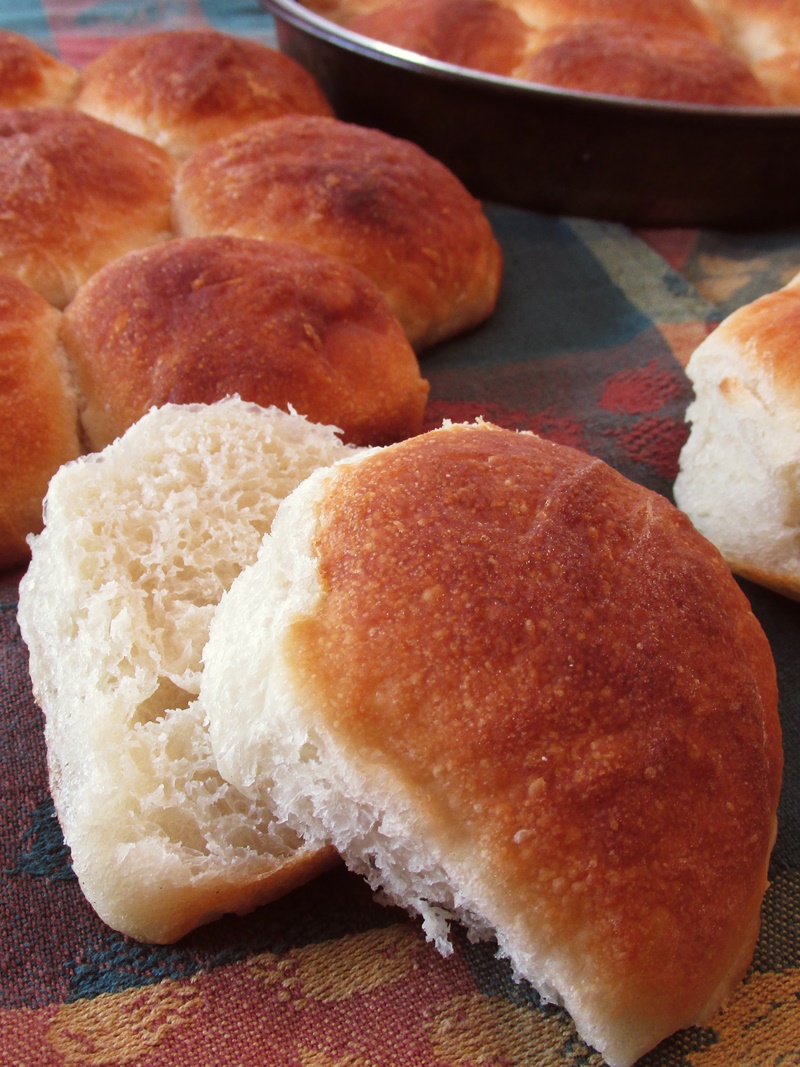
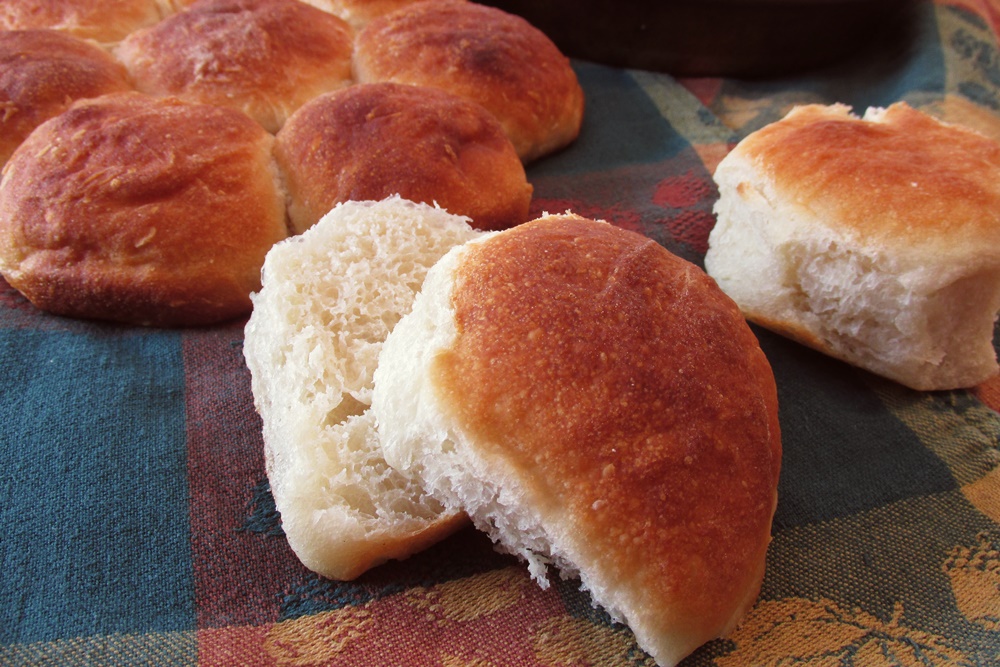
Katherine and her dad bake these rustic homemade rolls almost every weekend and have done so for nearly seven years. They are an easy bread to reheat for weeknight dinners or toast for breakfast, plus they make cute sandwiches. It’s nice to have them on hand to give a pan to a friend or neighbor or take to a bake sale or other event. They double the recipe for holidays and neighborhood parties.
And if that isn’t enough to get you baking, one of Katherine’s brothers and her sister chose this rustic homemade rolls recipe for their school cookbooks when they were asked to provide a recipe for their favorite food. And every year, Katherine’s grandmother asks for her very own pan of these homemade rolls for her Christmas present. They remind her of the soft, tender rolls her grandmother baked when she was growing up.
Beyond the end result, Katherine enjoys the process of making these with her dad; her favorite part is shaping the rolls. The recipe does have quite a few steps, but don’t be deterred by the details. The hands on time for these homemade rolls is minimal, most of the time involved is resting and rising, and the result is a week’s worth of versatile bread for the whole family. Who knows, they just might become a tradition in your home, too!
For best results, Scott recommends weighing the water and particularly the flour rather than measuring them, as different flours have different weights and this can affect the final product.

Special Diet Notes: Rustic Homemade Rolls
By ingredients, this recipe is dairy-free / non-dairy, egg-free, nut-free, peanut-free, soy-free, vegan / plant-based, and vegetarian.
- 763 grams of water (approximately 3⅜ cups), heated until tepid
- 1 tablespoon instant yeast
- ⅓ cup sugar
- 1050 grams of all purpose flour* (approximately 8⅓ cups)
- 1 tablespoon kosher salt
- 1 tablespoon plus 4 teaspoons extra-virgin olive oil, divided (plus additional as needed)
- Place the water, sugar and yeast in a large bowl, and let sit a few minutes to proof. For best results, Scott and Katherine recommend weighing the flour and water rather than measuring them.
- Stir in the flour slowly, about a heaping tablespoon at a time. Once all of the flour has been added, knead well for approximately 10 minutes, either with a dough hook mixer attachment or by hand. The dough is fairly wet and won't get very tight.
- Let the dough sit for 30 minutes.
- Add the salt and gently knead the dough until it's incorporated.
- Brush the inside of a large bowl with 1 tablespoon of the olive oil. Put the dough in the oiled bowl, turn it over, cover with a clean dish cloth, and let it rise until doubled, anywhere from 60 to 90 minutes.
- Turn the dough over on itself, then let it rest for another 30 minutes.
- Turn the dough over on itself again, then let it rest for another 30 minutes.
- Brush four round 9-inch cake pans with 1 teaspoon of the olive oil each.
- Punch down the dough and place it on a floured cutting board. Cut the dough in half, then in half again, making four equal portions.
- Cut one of the four portions into eight equal pieces.
- Shape one of the eight pieces of dough into a ball by tucking the edges under the center. Place in the center of an oiled cake pan. Repeat with the additional seven dough pieces, placing them in the pan around the center roll like the petals of a flower.
- Repeat the cutting, shaping and placement with the three remaining large portions of dough and three additional cake pans.
- Lightly grease the tops of each pan of rolls. Spray oil is easiest for this step, but a pastry brush dipped in olive oil can be used.
- Cover the pans with plastic wrap and let rise for 30 minutes.
- Preheat the oven to 475ºF. Place a large roasting pan or 9x13 metal pan on the bottom shelf of the oven when preheating.
- Remove the plastic wrap from two of the pans, and place them on the middle rack of the oven. Quickly pour a half cup of hot water into the empty pan on the bottom shelf. This job--for an adult helper—helps form a rustic crust on the rolls. Bake the rolls for 17 to 20 minutes until golden brown.
- Immediately remove the rolls from the pans to a cooling rack.
- Repeat the baking process with the remaining two pans.
27 Comments
I have a Grandson with severe allergies, no dairy, eggs, soy, beef, turkey and so on he is 11 and has not outgrown them. He’s never had a hamburger bun. So when I made these I used my big cake pans so they didn’t touch. They came out beautiful with and without the water bath. I’m taking them to his 12th birthday Saturday as a surprise! I tried one, soft in the center…just GREAT! THANK YOU
That’s wonderful! Thanks for the feedback and glad the recipe worked so well for you Ruth.
My cake rounds have magically grown legs and ran off, could I use a casserole dish or such instead?
Definitely!
I made these without the steam bath, and they were awesome!!
Definitely a bread you have to prepare ahead for, but well worth it
Awesome! Glad you enjoyed it Christina.
Hi. At what stage do you recommend freezing the dough? Only two of use so I would probably bake one pan and want to freeze the rest. Thank you.
Right after Step 13. You want the final rising to be done just before baking. You can actually defrost it in the refrigerator overnight, then remove to the counter to come to room temperature while you preheat the oven.
Pingback: Honey Buns Recipe (Easy Dairy-Free Cinnamon version)
These, unfortunately, didn’t work for me. They look light and soft in the pictures, but when I made them they were dense, tough and chewy. Any ideas on what could have gone wrong?
It sounds like you were dealing with inactive yeast Rachel. Did you proof it first to ensure it was active? It should have foamed / made small bubbles in step 1. This is actually a pretty standard white roll / bread recipe so you should get the results shown as long as your yeast is active.
In your recipe you say to use instant yeast which is different from original activedry yeast. As far as I understand, the instant typically is used without proofing. Is this correct?
I believe so. This is Sarah’s recipe, and she is busy making dinner with her family right now, so I can’t verify with her! I don’t typically use instant yeast. If you only have active yeast, I would proof and double rise as usual.
Can you make the rolls to the final rise (step 14 I think?), then fridge them until your ready to bake them on Thanksgiving?
Yes, you can Korrie. You can refrigerate for your second rising. Just pull them out a little bit before baking, to bring them to room temperature.
Could a gluten free all-purpose flour be used for this recipe?
You would likely have to make other adjustments beyond just gluten-free flour Tabatha.
Pingback: A tasty, not-too-sweet, dairy-free sweet potato casserole
I need these at my Thanksgiving table. These are so beautiful and would be a great addition to the holidays!
These rolls look amazing and something my kids would love! Hope they can try to make these as well. A must-try. 🙂
What a wonderful tradition!! They look so fluffy and moist! I cannot wait to try them!
These rolls look so fluffy and delicious! Yum!
Bread is my guilty pleasure I need a piece of this now =)
My college boy adores rolls like this! He will sit down and with the appetite of a 19 year old clear a plate in a flash. Always nice to find another dairy-free recipe that he can eat with abandon!
These are so simple! A good dinner roll is a must!
these DO look so soft… fluffy. we are having a Friendsgiving this weekend, I am adding these to the menu!
Okay, now that sounds like an awesome event!!