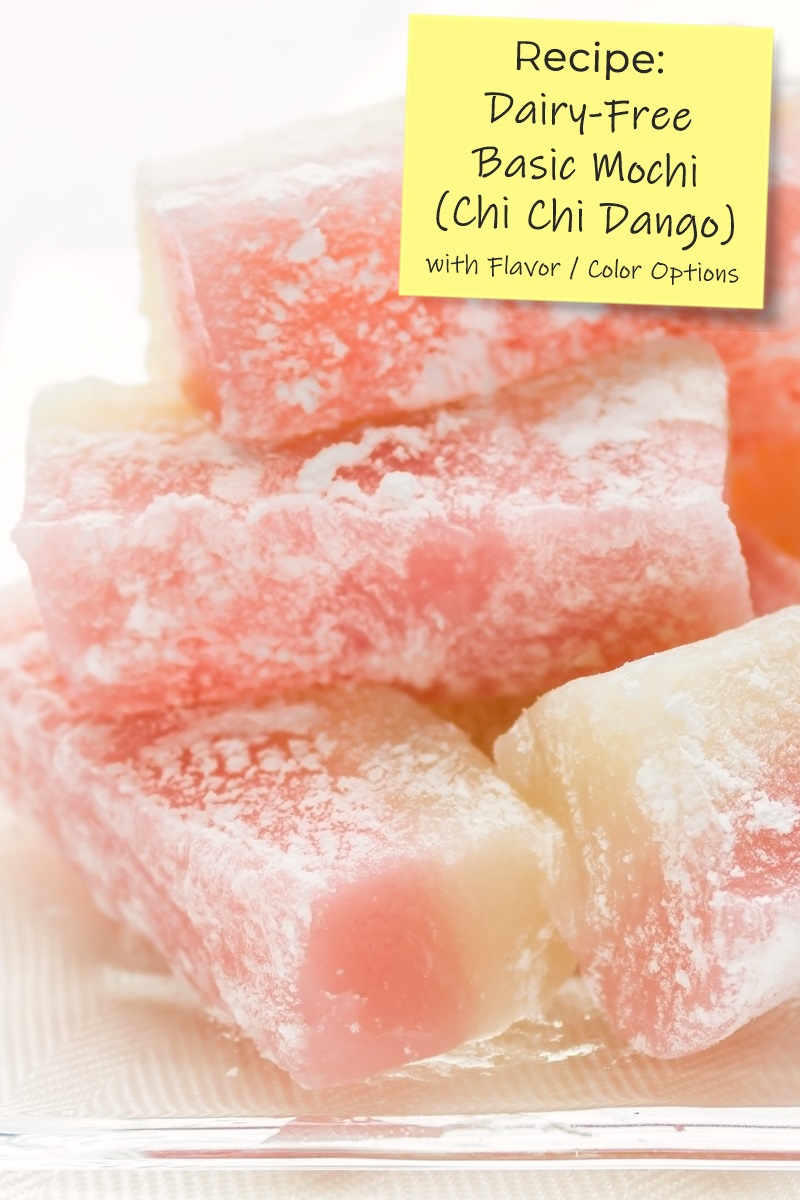
There are various types of Japanese mochi, many of which are naturally dairy free. But some varieties are made with different types of dairy milk or butter. Chi chi dango is a variation on traditional dairy-free mochi that’s popular in Hawaii and is typically made with coconut milk. It’s fun and easy to make, and has the delightful sticky chewiness that makes mochi so unique.
How to Make Easy Dairy-Free Mochi (aka Chi Chi Dango)
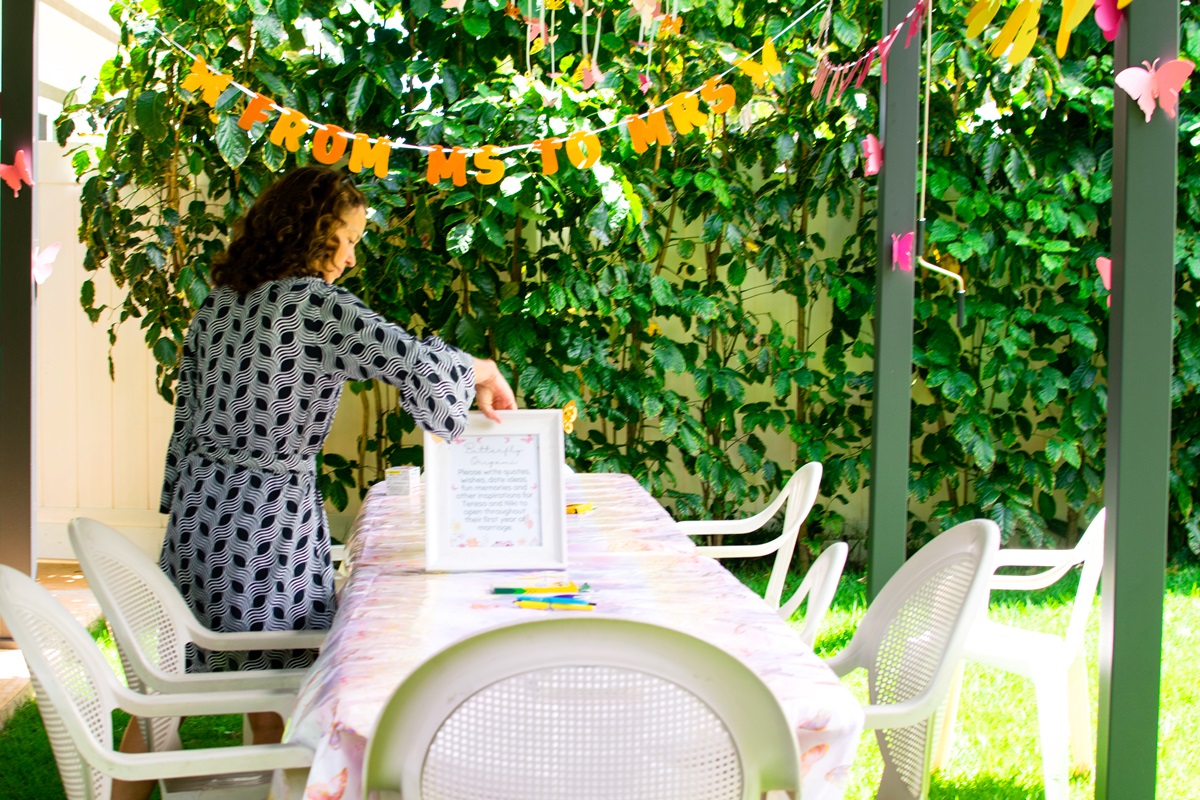
I learned about chi chi dango at the dairy-free gluten-free bridal shower I cohosted with a friend. We didn’t ask anyone to bring outside food, due to the dietary concerns. But a kind guest named Sharleen brought chi chi dango, which is naturally gluten-free and dairy-free mochi. She even made it pink to go with the bride’s colors! Sharleen shared her recipe with me, and I’ve since tried it a few different ways. Based on my tests, I’ve added a few notes and options to her recipe, and I have answers to some FAQs.
What Does Chi Chi Dango Taste Like?
It’s basically like mochi without a filling. But if you haven’t had mochi, I would liken it to creamier Japanese- and Hawaiian-style gummies. It has a wonderful soft chew and light sweet flavor.
How Do You Get the Colors and Layers?
For colors specifically, natural food dye is the best option. Some of the flavor options will create some color, but food coloring is best if you want a strong or clean look. For creating layers, see the notes in the recipe.
What Other Flavors Can I Make?
The sky is the limit! Extracts and flavors will produce the most intense taste and come in so many varieties. Fruit flavors go very well with this dairy-free mochi, like orange or strawberry. I like to add them to taste, in addition to the vanilla. But you can go crazy with other fun flavors, if you like. See the recipe notes for suggestions on using powders or juices.
Can I Use Less Sugar?
Believe it or not, this dairy-free mochi is not overly sweet. It’s like a gentle candy that you eat in small portions. You can even cut it smaller for “treat” sized bites. It’s up to you if you do want to use less sugar, but reducing the sugar or using a sugar-free alternative will affect both the taste and the texture a little. Sugar does add some of the chewiness to chi chi dango.
Can I Use Almond or Oat Milk Instead of Coconut Milk?
This recipe uses full-fat canned coconut milk (sold in the international section), not coconut milk beverage (the type sold in large cartons that you drink). Milk beverages, like almond and oat milk, are not seamless swaps. Using a milk beverage would require other tweaks to the recipe that we haven’t tested.
It Looks a Little Deflated and Firm on the Edges. Is this Normal?
Chi chi dango steams and puffs up as it cooks, and settles in once it cools. It can become a little more firm around the edges, which creates a slight indent. To avoid firm edges, you can bake the dairy-free mochi in a water bath. To make a water bath, place your foil sealed dish of uncooked mochi inside a larger baking pan. Bring some water to a boil, and pour it into the larger baking pan until it reaches about 1 inch up the sides of your mochi dish. Bake as directed. This will help prevent any hard edges. Be careful when moving the pan to avoid splashing any hot water on yourself.
Why Do I Need to Use a Plastic Knife?
Chi chi dango is very sticky, and is less likely to stick to a plastic or ceramic knife than a metal one. If you only have a metal knife, try carefully greasing it first.
Can I Make it Ahead and Keep it in the Refrigerator?
In terms of making it ahead, I’ve read good reviews from people who leave it covered overnight to cool. It will keep during the day at room temperature if tightly covered. People do refrigerate it, but I am in the no refrigeration camp. It’s best to tightly wrap and freeze the leftover mochi to preserve the texture.
Can You Eat Dairy-Free Mochi Straight from the Freezer?
You actually can. Dairy-free mochi keeps very well in the freezer, as long as it’s tightly wrapped. When you first take it out, it’s a little firm but still edible. If you let it sit at room temperature for a few minutes, it will quickly soften to that perfect chewy texture.
What is Mochiko?
It’s also called sweet rice flour or glutinous rice flour, and is a flour made from glutinous short-grain Japanese rice. In recipes like chi chi dango, it lends a sticky, chewy texture. And despite the glutinous description, it is a gluten-free flour. Traditional mochi is made from rice that has been ground, steamed, and pounded into a sticky ball. Mochiko flour is basically a shortcut to that more elaborate process.
Where Can I Find Mochiko?
Look for mochiko in the International aisle with the Japanese food or in the baking aisle with specialty flours. In the baking aisle, it’s more likely to be called “sweet rice flour” or “glutinous rice flour.” I find it’s cheaper at Asian markets, but most grocers carry it.
I’m from Japan. Why Have I Never Heard of Chi Chi Dango?
Chi Chi Dango did originate in Japan, but it was made popular in Hawaii. The first recipe was created in a small town in Japan using dairy milk and is still only known in the eastern part of the Hiroshima district. However, you can find the dairy-free coconut milk version of chi chi dango at stores throughout the Hawaiian islands.

Special Diet Notes: Dairy-Free Chi Chi Dango
By ingredients, this recipe is dairy-free / non-dairy, egg-free, gluten-free, nut-free, peanut-free, soy-free, vegan, and vegetarian.
- 1 pound mochiko (sweet rice flour)
- 2¼ cups sugar
- 1½ teaspoons baking powder
- 1 (13.5-ounce) can coconut milk
- 1½ cups water
- 1 teaspoon vanilla extract
- Few drops natural food color (optional)
- Potato starch or cornstarch, for rolling.
- Preheat your oven to 350°F, and grease or line a 9x13-inch baking dish with parchment paper.
- In a large mixing bowl, whisk together the mochiko, sugar, and baking powder.
- Add the coconut milk, water, and vanilla and whisk well until combined.
- Whisk in food coloring, if desired.
- Pour the mixture into your prepared pan and cover it tightly with tinfoil.
- Bake the mochi for 1 hour.
- Lift the foil off using tongs from a corner so the steam doesn't vent on you.
- Let the mochi cool completely, which can take a few hours.
- Loosen the edges of the mochi and lift it out of the pan onto a cutting boar. Cut the mochi into squares or small rectangles with a plastic knife, separating it as you cut to avoid re-sticking. Roll each piece in starch.
- Serve the same day. Individually wrap and freeze any leftover mochi.
Layered Mochi: For two layer mochi, divide the mochi batter in half and color and/or flavor each half. Pour one half into your prepared pan, cover, and bake it for 15 minutes. Carefully remove the tinfoil using tongs (to avoid the steam), and pour on the second half of the batter. Cover it again, and finish baking for the remaining 45 minutes. For three-layer mochi, the process is the same, but you'll divide the batter in thirds, adding the second layer after 15 minutes of baking, and the third layer after 30 minutes of baking.
Enjoy More of Our Dairy-Free Gluten-Free Shower Ideas!