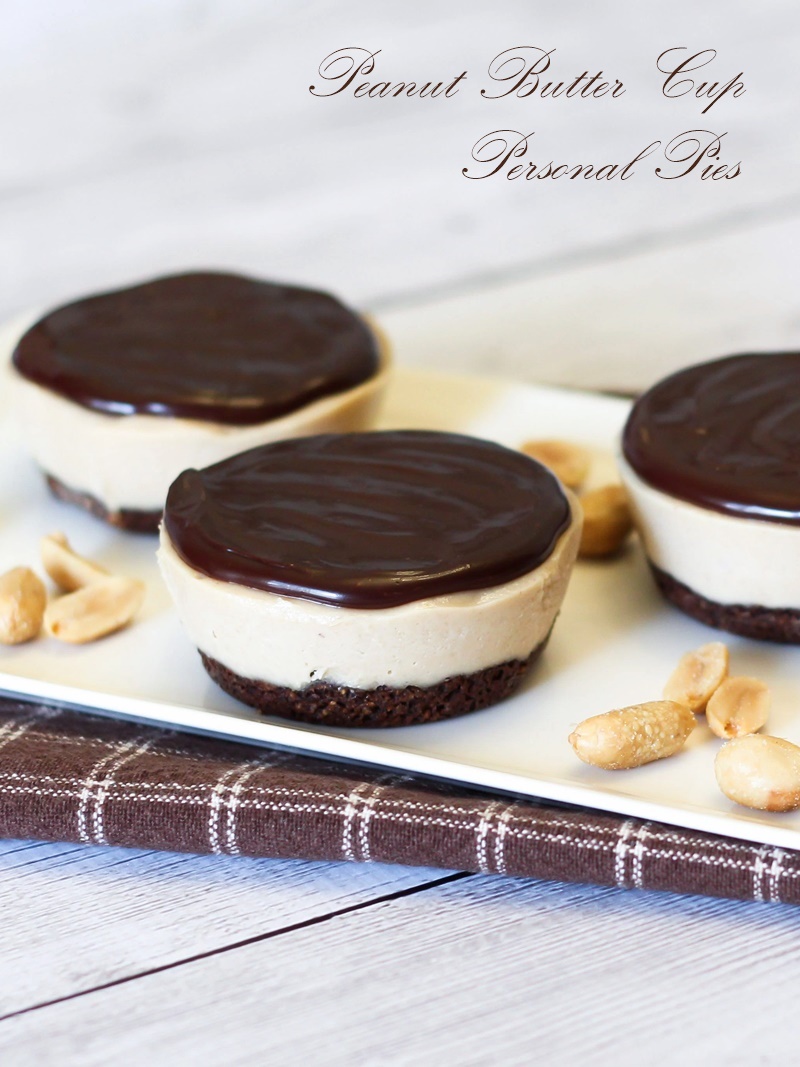
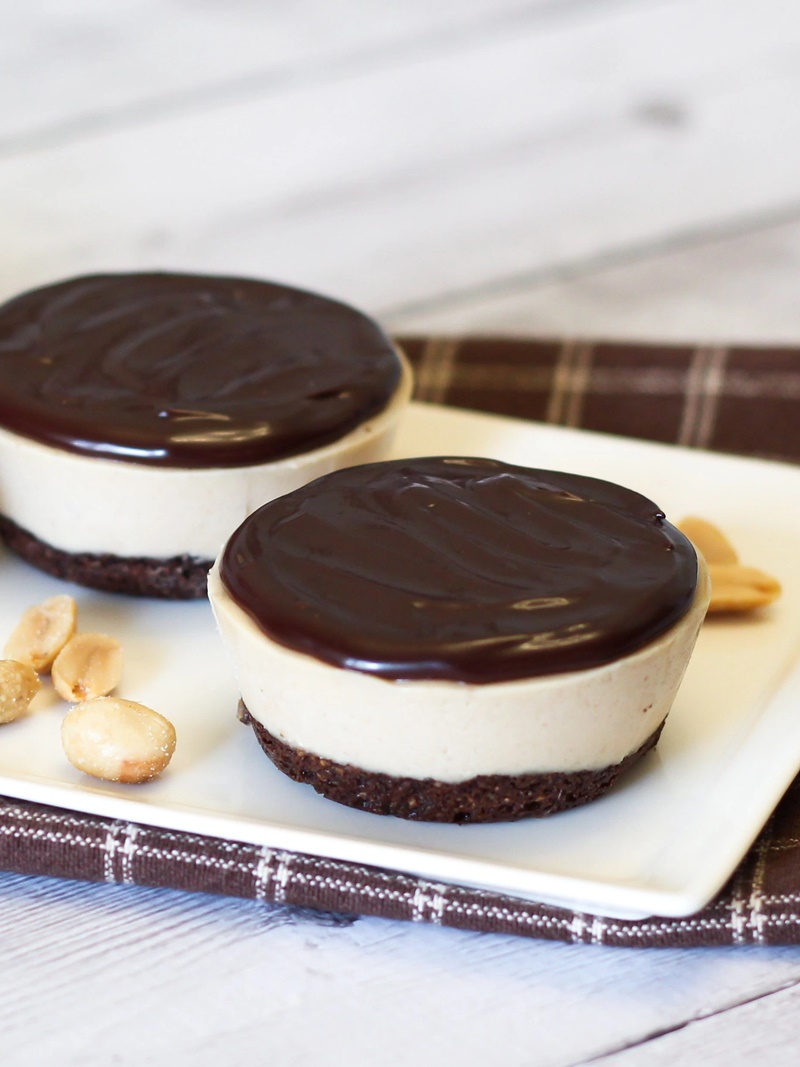
 This deliciously rich concept actually crosses the line into snack territory with a taste that isn’t too sweet. Of course, you can increase the sweetness in these peanut butter cup pies for full dessert appeal. The recipe and stunning photos were submitted by Sarah Hornacek of Sarah Bakes Gluten Free as a Sweet entry in the BIG Snackable Recipe Contest (entries are now closed, but the winners will be announced on that post!).
The contest is a celebration of our new FREE Snackable eBook with delicious, original Sweet, Savory and Sippable Dairy-Free Recipes. Download and enjoy it now via PDF, iTunes, Kindle, Kobo or Google Play: www.godairyfree.org/snackable-ebook
 To qualify for the contest, this recipe for Peanut Butter Cup Pies uses Culinary Coconut Milk from So Delicious Dairy Free.
Alisa’s Notes
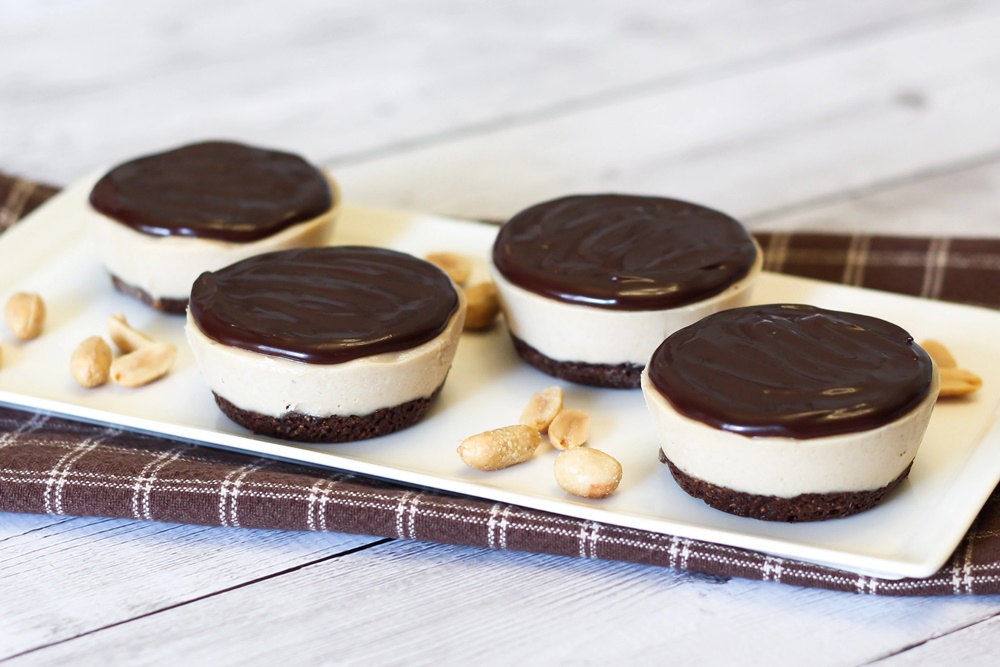
 Since I have tested and approved this recipe for chocolate peanut butter cup pies as one I would repeat, I’ve added it to the “Alisa’s Recipes” section. Here are my personal notes on the recipe:
Snack or Dessert? The sweetness of these peanut butter cup pies is relatively mild, and Sarah lets the nuts take center stage. For that reason, we did enjoy some of these as a snack – much like you would a bar! But, we also had a couple as a fulfilling dessert – if you are looking for a straight up indulgence though, I would up the cane sugar a tablespoon or two, to taste.
Cheesecakes to Pies – Sarah’s original recipe is called peanut butter chocolate cheesecakes, but the filling doesn’t have a classic cheesecake tang or pungency. It is thick and rich and somewhat cheesecake-like in texture (though a touch softer), but the flavor spoke more to peanut butter cup pies, which is why the change in name.
Storage – These peanut butter cup pies keep for about 2 days in the refrigerator or can be frozen for longer. I actually preferred them straight from the freezer, but note that the chocolate ganache does not freeze solid. If you want it too freeze, use more coconut oil.
Special Diet Notes: Chocolate Peanut Butter Cup Pies
By ingredients this recipe is dairy-free / non-dairy, egg-free, gluten-free, soy-free, vegan / plant-based, and vegetarian.
For peanut-free peanut butter cup pies, feel free to swap in sunflower seed butter for the peanut butter.
- ½ cup almond flour
- 3 tablespoons gluten free oat flour*
- 2 tablespoons cocoa powder
- 1 tablespoon cane sugar
- Dash sea salt
- 2 tablespoons coconut oil, melted
- 1 tablespoon pure maple syrup
- 1½ cups raw cashews, soaked in hot water for 30 minutes
- ⅓ cup So Delicious Dairy Free Lite Culinary Coconut Milk
- ⅓ cup creamy salted peanut butter
- ⅓ cup pure maple syrup
- 2 tablespoons cane sugar
- 2 tablespoons coconut oil, melted
- 1 teaspoon pure vanilla extract
- ⅓ cup cocoa powder
- ¼ cup pure maple syrup (plus additional, to taste), room temperature
- 2 tablespoons coconut oil, melted
- To make crusts, preheat your oven to 350ºF.
- Stir together the almond meal, oat flour, cocoa powder, sugar and salt in a medium bowl. Stir in the melted coconut oil and maple syrup until well combined.
- Lightly grease a standard 12-cup muffin tin (unnecessary if using silicone) and place strips of parchment paper in each slot to create tabs for easy removal. Divide the crust mixture evenly into the 12 wells, and press firmly to even out.
- Bake for 8 to 10 minutes. Allow to cool completely in the pan, while you make filling.
- To make the filling, drain the cashews and place them in a food processor or high-powered blender with the coconut milk, peanut butter, maple syrup, cane sugar and melted coconut oil. Blend on high for 1 to 2 minutes, or until smooth and creamy. Add the vanilla and pulse to combine.
- Pour the peanut butter mixture on top of the cooled crusts in your muffin tin and even it out. Cover and chill in the freezer for 2 to 3 hours, or until firm.
- To make chocolate glaze, whisk or blend the cocoa powder, maple syrup and coconut oil together until smooth and creamy. Taste test and add an additional 1 to 2 teaspoons of maple syrup, if desired.
- Remove the personal pies from the freezer. Carefully remove each pie from muffin tin, by using parchment paper tabs and butter knife to help pop them out. Spread with the chocolate glaze.
- Store in refrigerator until ready to serve. Can be frozen, if preferred.
6 Comments
Can you use cupcake liners instead of parchment paper in the tins? I was thinking it might be easier. 🙂
Yes, definitely, they will just have the liner “rivets”.
These look delicious. By coincidence, I just bought some coconut milk to try making whipped coconut cream. If it works, I’m sure I’ll do be doing more recipes containing coconut milk. (I realize that the coconut milk in this particular recipe isn’t whipped:) )
That’s awesome Laura! I do coconut whip a lot around here – extra vanilla helps 🙂
These certainly look and sound amazing! I have no problem with the ganache not freezing all the way. That makes it easier to eat these pretty much right out of the freezer. 😉
Shirley
Yeah, I’m just a crispy chocolate lover 🙂